


- Download and Extraction: Download the software from the download web page. The software is compressed into a zip archive. Its content can be extracted by the Windows explorer (since Windows 7), by 7-Zip or many other programs. In the extracted files you will see two folders: webapp and printserver.
Webapp
- Select a web server: The content of the webapp folder contains the core component of OrderSprinter. These files need to be uploaded to a web server that has PHP5 enabled and that can access a MySQL data base (if you want the security of transactions you need the innoDB engine for MySQL. This is a standard customization of most web servers. If you do not want to care yourself for a web server you can use the various commercial web server products (please google for web provider or home page). It is important that the performance of PHP is good, otherwise OrderSprinter cannot react as fast as expected.
- Upload: From now on this guide supposes that you have chosen a commercial web server. After the registration the web provider will give you the authentication details that you need to access your new web package and the MySQL data base. Usually you can upload files to your web package with an ftp program like filezilla. If there is a folder www in your web package the content of the extracted webapp folder (see step 1) must be uploaded to that folder. Otherwise upload the content into the root folder.
- Write access: The file config.php in the directory php on the web server must be writable. That can be set with every ftp program.
- Open your web page: The web provider has given you a web address after the registration. With this address you can open your web page in an internet browser. Mostly these addresses have a format like http://www.the-webprovider.de/user_account. Enter this address into your web browser. After some dialogs (language anxd time zone selection) a page like this should appear:

You can change the installation language again by clicking on the flags in the bottom area.
- Data base: Enter the access values for the MySQL data base in the data base fields of the installation page. To test if the credentials are valid you can test them with the button Test db access.
- Admin password: Choose a good password for the administration access and enter this twice into the installation mask in the area Application.
- Currency and Decimal Point: User outside of Germany probably need to change the pre-filled currency text and decimal point character.
- Start installation: A click on Start Installation initiates the installation on the web server. Depending on the speed of the web server the installation may take some seconds up to a minute. You can specify the general workflow and sample data to be inserted. Afterwards you will see a page to logging in to OrderSprinter:

- Log in: Type in the admin password (that you specified in step 7) and log in. You will see a page with the preferred settings of the admin user.
The following steps (menu, room plan, user configuration) are necessary if you started with an empty data base or want to change the settings.
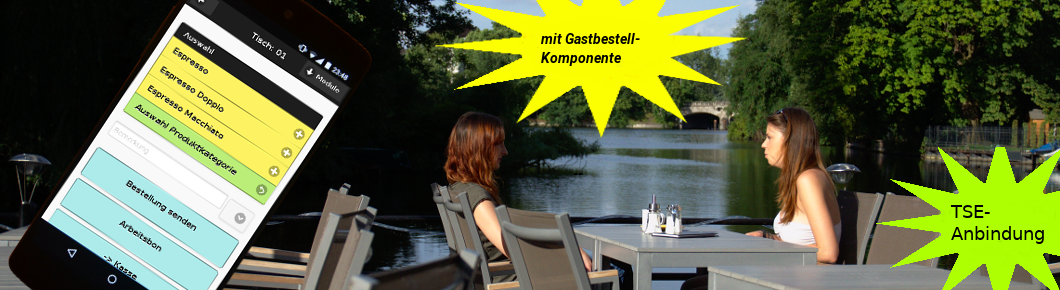
- Plan of rooms: In the upper right corner there is a module button. Click on it and select Administration. The administration module opens. The last section is Data base. Unfold this section by clicking on it. You will see another two sections, one called Plan of rooms - click on it. Set the numner of rooms or areas on which the tables are distributed, and the maximal number of tables of a room. Click on Change room size. Now you can define the name or number of each room and table. Empty fields won't be counted as tables:

Click on Apply. - Specify menu: In the adninistration module there is also the section Menu under Data base. After the installation you will see a sample menu that you sere as template for your own menu. The lines with deepest intendation are products, all other lines are categories with the depth due to the intendation. Each product line has some mandatory and some optional arguments. At minimum you must specify Short name for view in waiter module; Normal price; Product name for view in kitchen, bar, receipt. For test purposes you can of course use the unmodified sample menu.

Click on Apply to save the menu into the data base. - Creation of users: The administrator has intentionally only access to the administration views. Create users according to their roles (waiter, cook etc.) and give them the necessary rights for the needed views. This can be done in the administration module in the section Users. (If you log of and open the page of OrderSprinter again in the web browser the newly created users can be chosen in the drop-down list.)
- Configuration: In the section Configuration you can change the global operating settings of OrderSprinter.

Here you can customize the relevant settings, especially these settings are important:- Betriebsinfo: This info text will be printed on each receipt later.
- Logo-URL: The link to the logo that will appear on each receipt. If you want to use the print server this field must contain the complete URL (http://www...). If the field is kept empty no logo will be printed.
- Email Sender: If OrderSprinter shall be able to send emails this field must be filled by a valid email address that is known on the web server. It may be necessary that you create this email address first in your web package. If not sure ask your web provider.
- Standard Email Receiver: If your enter a valid email address in this field the details of each closing will automatically be sent to this address during its creation.
- Print concept: Lokal means that the receipt printer must be connected to the device on which OrderSprinter is applied from (where the browser runs). Server means that the print server will be used for printing receipts, instead (see later).
Print server
- Necessary? The print server is a Windows program. You need it if
- you want to initiate the print from mobile devices (e.g. paying at the table), or
- you want to print receipts from several devices to a printer, or
- you want to use several printers and due to the type of the print job and the user-specific print queue the print jobs shall be send to the intended printer
- Printcode: Specify a print code (password) in the administration view of OrderSprinter.
- Start on a windows computer: The print server must run on a Windows computer on which the printers to use are installed. The print server should be started with a path to a configuration file as argument. In this configuration file the print queues assignments are saved. If the configuration file does not exist it will be created during the first start. Thus start the print server with OrderSprinterPrintserver.exe /config:"c:\config.cfg" or another path to which you have write access.
- Printer assignment: Assign the printers to the varios printer slots. Additionally you need to set the web address to OrderSprinter, and the print code (the one of the previous steps). If you click on Start the print server starts listening for new print jobs.
- User-specific assignment: Each user can set the printer slot in his preferences ion the web access of OrderSprinter.
- Autostart: If the printing works correctly you can configure the print server to be started automatically when Windows is starting. Create a text file with the content OrderSprinterPrintserver.exe /start /config:"c:\config.cfg" and save it to the auto start folder. Then the print server starts automatically and listenes for incoming print jobs after the start of the Windows operating system.
Download
Any questions?
Contact me and maybe I can support you... s.pichel@ordersprinter.de
Any feedback, no matter of positive or negative, is welcome!